
I hope that you enjoy making this easy paper-pieced star.

Some materials that you will need
Thin paper that can go through your printer (regular paper is fine, but if you can put something like tracing paper through your printer all the better, or special paper that is designed for paper piecing)
Paper Scissors
Rotary Cutter
Rotary Cutting Mat
Acrylic Ruler
Stiff piece of paper or thin cardboard (like a postcard)
Print out 4 copies of this paper piecing pattern CLICK HERE FOR DOWNLOAD . When you print out the pattern make sure you have your printer set to “Print actual size”. Do not have scale to fit checked. Double check once you have printed the pattern that it is the correct size. The patterns should measure 6.5″ square measured from the dashed lines around the perimeter of the pattern and 6″ square from the solid black lines that are just inside the dashed lines.

Trim away the excess paper – trim about 1/2″ outside of the dashed lines.In paper piecing you do end up with some fabric waste, but if you pre-cut the fabric you can minimize the waste. For each block cut the following:


Steel – 2 – 8” squares
Expresso – 2- 8” squares

Delft – 2 rectangles 4” x 1.75”
Aqua – 2 rectangles 4” x 1.75”
Purple – 2 rectangles 2” x 7”
Blue – 2 rectangles 2” x 7”
Berry – 2 rectangles 3” x 1.75”
Pink- 2 rectangles 3” x 1.75”

Cut the Steel and Expresso squares in half along the diagonal.
Each block is made up of two A sections and two B sections
“A” section of block


Take a triangle of Steel and one of Expresso and place them right sides together. Place the Expresso fabric against the paper (wrong side of fabric facing paper) and extend the long endge of the triangle about ¼ inch past the line. Pin in place


Shorten your stitch length to 2.0 on your machine. Shortening the stitch length will make it easier to remove the paper at the end. Sew directly on the dark line starting a little before the line begins and stopping a few stitches after the line ends.


Press the pieces open

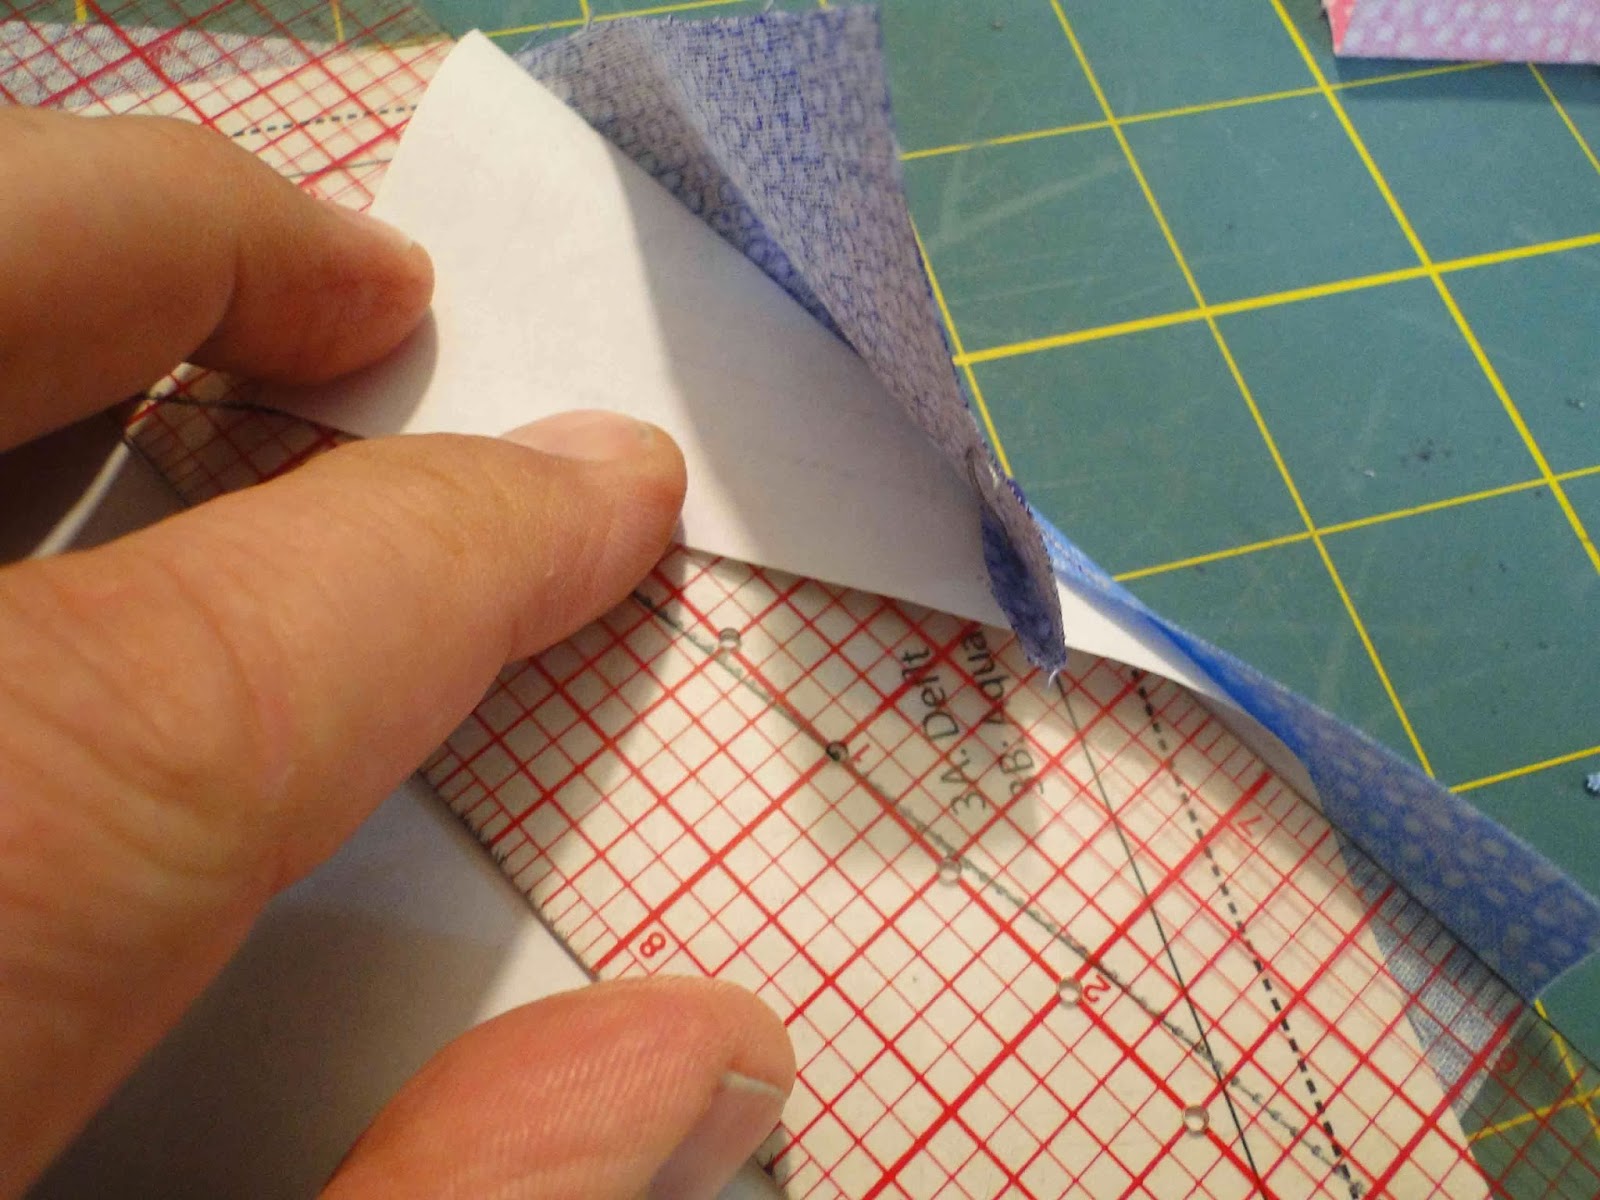
Turn the paper pattern over so that the lined side is facing you and fold the paper along the line between # 2 and # 3.


Take your rotary cutting ruler and line up the ruler so that you have ¼” showing past the paper and trim your fabric.


Take the Delft rectangle (4” x 1.75”) and line it up with the edge of the fabric. Flip the fabric over to make certain that it will cover the area for piece # 3. Pin in place, sew and press open


Fold the paper back between # 4 and where it meets # 1 and # 2. If needed pull the fabric that might be stitched away from the paper. Take your rotary cutting ruler and trim leaving ¼” fabric seam allowance

Take the 2” x 7” rectangle of Purple and place it along this edge lining it up so that when opened it will cover the area for # 4. Pin in place with fabric right sides together and then stitch along the line. Iron seams open.


Fold back the paper between #5 and # 4 and trim the fabric as before to ¼”. Sometimes you might need to pull the paper away from the stitched line. Carefully do this so that you don’t rip out the stitches – the shorter stitch length should help keep them in place.


Take the 3” x 1.75” piece of Pink fabric lining it up so that when sewn and pressed open it will cover the # 5 area.

Pin in place and stitch on the line. Press the seam open.

Trim finished “A “section along the dotted lines – this block should measure 6 ½”. Make a second “A “ section exactly the same way.


“B” Section of the block


Sew the B sections (2 sections) in exactly the same order as you did the “A” Section. The fabric colors are printed on the paper template to aid in placement.
Sewing the block
Take the for sections of the star block and arrange them so that they are in the proper order


Flip the right hand pieces over so that they are on top of the left hand pieces. Pin in place putting pins at the corners


Sew the top A section to a B section – press the seams towards the Purple and Black.
Repeat the process with lower A and B sections, pressing the seams to the B section.Tear away the paper that is in this newly created seam.


Align the to block sections together and sew across them together


Now the fun begins – carefully tear away the paper from the back of the block .

Here is the finished block!

So what can you can you do with this block?
- Add some borders to this and turn it into a pillow, or small table topper, or wall hanging.
- Make three of them and sew them together and add a border for a table runner.
- Make four of them and some them together (with or without sashing) and some borders and make a small wall hanging
- Make all the different star blocks in this blog hop and create your own star sampler quilt.
I love the colors in this line of fabric – what is your favorite color to use in a quilt -and/or what is your least favorite color. Leave a comment below and I will pick out a winner on Saturday – you will receive a 1/2 yard of each of the fabrics featured in this block.
Also – make sure you stop by Kimberly Einmo’s blog tomorrow – www.kinberlyeinmo.com/blog for a fabric giveaway and for a big give away at the Timeless Treasures blog!


its strange, I love sewing with Blues. and I hate Yellows…….
LikeLike
I love using teals and reds! I think blacks and browns are the hardest to use for me 🙂
LikeLike
I love using blues and greens and have a hard time using browns.
LikeLike
uhhh I love FPP stars, yours is lovely! I love blue
LikeLike
I am new to quilting I am working on a blue yellow and green blue and yellow is really pretty
LikeLike
My favorite color to use is blue. Least favorite is yellow! Thanks for the giveaway opportunity.
LikeLike
John, , like many others your link does not take me to your download for the pattern. Can you help??
LikeLike
I love using red and white the most!
LikeLike
My favorite color for a quilt would be RED!
LikeLike
Great block!!! My favorite color to use is any shade of blue. Thanks for the tutorial 🙂
LikeLike
I'm not able to download the pattern. Could you please email it to me at cpup40@aol.com. Thank you for your help in this matter.
LikeLike
I love purples and pinks and with the black they pop in this block. Would love to try it, but it won't let me download the pattern. 😦
LikeLike
I too was unable to download the paper pieced pattern. Love the design and my favourite colours are the pastel with black. Thanks for the giveaway.
LikeLike
I love to use purple, my least favorite is black. Although, I have discovered that I tend to use a lot of black, anyway. Thanks for the giveaway. Love all the stars. What a fun hop.
LikeLike
What a fun block. I love the precision that you can get from a paper pieced block. I am in love with all the bright jewel tones like emerald, ruby, royal blue and purple. My least favorite color is brown. But sometimes colors that you don't really like are necessary to give your quilt life. LOL. Thanks for the opportunity to get some great fabrics.
LikeLike
I'm a bit late in finding these blocks, but when I got to yours, I am unable to find your PP template to download. When I click on the “Download” button on your blog, it takes me to a page that has nothing to do with you or paper-piecing. Can you help? I appreciate it! Vivian
LikeLike
My favourite colour is red, I'm not keen on pink, but I'll use it in something for another person if they it. You didn't say if the giveaway is open internationallly or not – I'm in the UK.
LikeLike
My favorite colors are black, white & red. I guess my least favorite color is pale pink – I'm not a pale color person!
LikeLike
Green is my favorite color at the present time. I don't really have a color that I don't like to use.
LikeLike
I concur with the download issue. It takes you to blogger and then you are just lost. Thanks.
LikeLike
You make paper piecing look so easy (yes, I'm a bit intimidating by this method of piecing!). My favorite color is orange, but it's funny that I don't quilt with it very often. Judging by my stash, green seems to be the winner. My least favorite color to use would probably be black. I'm always drawn to crisp white sashings so I seldom use black for anything.
LikeLike
I love using the bright colors, but one needs the dark ones to add visual interest! I can be reached at varanofobake60@gmail.com Thanks for the directions
LikeLike
My favorite color to use in a quilt is red. My least favorite color to use in a quilt is orange.
LikeLike
I like using bright colors that pop, like reds and yellows.
LikeLike
Blue and purple seem to make it into most of my quilts.
LikeLike
Where do I find the pattern? When clicked on 'click here for pattern' I got a blogger website. I don't want to blog.
Thanks
LikeLike
I love red and will use to make this star. Thanks for the pattern.
LikeLike
Thanks so much for this pattern! I love the movement in it. My favorite color to use in a quilt is purple and my least favorite is brown.
LikeLike
My favorite color to use in a quilt is blue. I think brown is my least fav. Great block, looking forward to trying it!
LikeLike
I honestly can say I don't have a least favorite color. I do prefer lively colors to drab or muted ones. I love your block!
LikeLike
Great block. I need to try foundation piecing, so I'm printing this. My favorite color to use is blue or purple, lol
LikeLike
Great unique star. I love it.
LikeLike
Well, today my favorite color is red, and it has been my favorite for a year. You know how a quilter's favorite color constantly changes. Who knows what it will be tomorrow. I love all colors, but if I had to pick a least favorite, it would be purple. Funny thing about that, it used to be my favorite color. Go figure!
LikeLike
I love all kinds of stars and yours is different than any I have seen. Right now I am in love with Aqua's.
LikeLike
The download didn't work for me either….a lovely, artsy, modern approach to a star!
LikeLike
Stars are so interesting…it's great to see so many varieties. Really like yours! Lately, I am liking the aqua color that I often see in quilts now. Don't care much for red, dark purple or orange.
LikeLike
I love all colors, but not too excited about orange with green.
LikeLike
I'm a fan of the all shades similar to the 2014 Pantone color of the year Radiant Orchid. I have to say values of orange are my least favorite, I have a limited color supply and usually have to make a shopping day for that color.
LikeLike